Routes - View Planned Route
The Planned Route section displays a map and the route in which you should carry out the inspections.
Example of Planned Route Section:
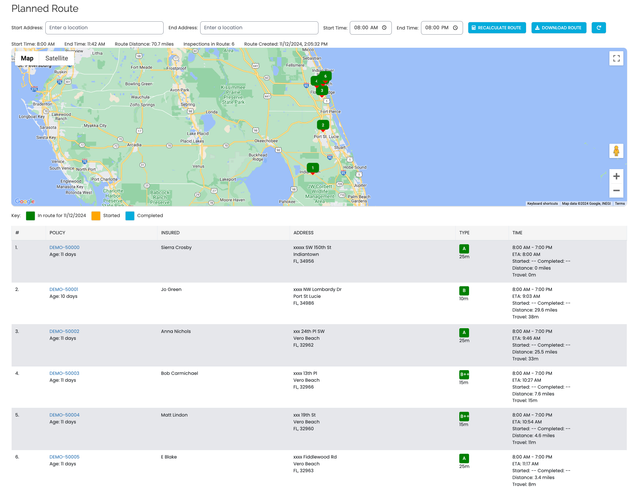
If there are no inspections and the map is blank but there are assigned inspections for that day then no route has been calculated by your Scheduler Administrator. Please contact your administrator to have them calculate a route.
Map
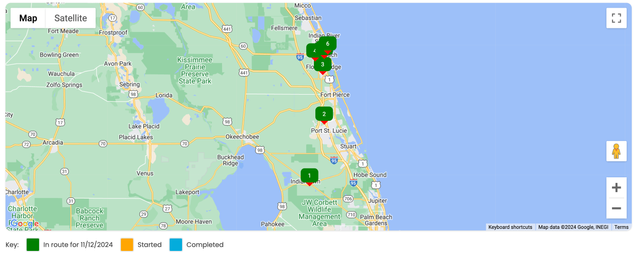
The map details the suggested route with numbered pins showing where a property is located and the order of the route.
Example of Planned Route Map:
Example of a Map Pin:
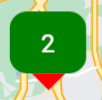
In this example, it shows the 2nd inspection in the planned route. If you click on the colored pin, you are presented with more details:
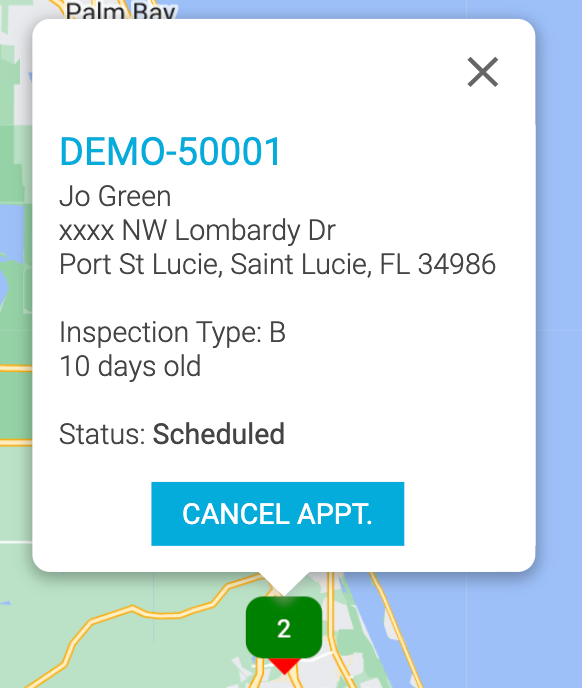
The policy number is a link that will open the Inspection Overview page in a new tab.
The details of the property owner are displayed, together with the inspection type, how old the inspection is and the status.
The Cancel Appt button allows you to cancel the appointment. If you do cancel the appointment then it is removed from the Assigned Inspections list and Planned Route list for the selected day. You should ensure that you make another appointment to ensure the inspection is scheduled.
The color of the pin is determined by the status of the inspection and updates as you work on your inspections in the route. In the example below, it can be seen property 1 has been completed (blue pin) and property 2 is currently in progress (orange pin), while the others (green pin) are scheduled and still to be started:
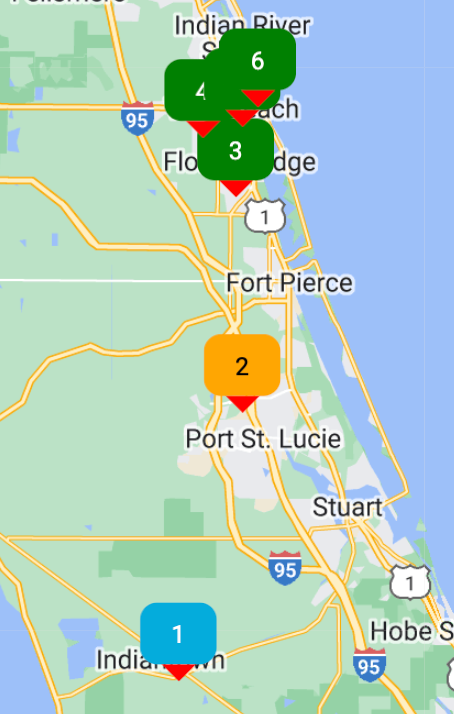
Green = Scheduled
Orange = Started
Blue = Completed
Planned Route List
Underneath the map is the list of your inspections in order of routing.
Example of Planned Route List:
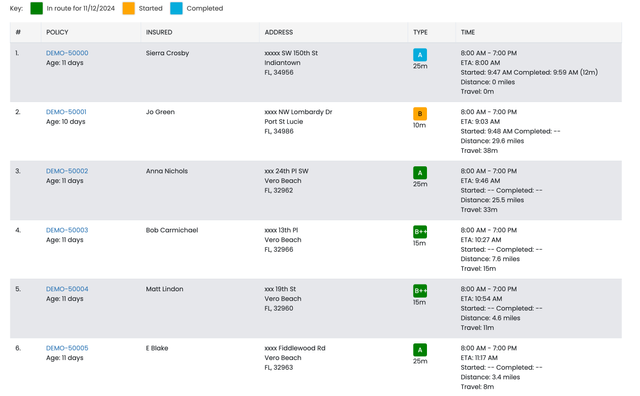
This list displays the relevant information for each inspection:
'#': The number on the planned route
Policy: Displays the policy number and includes a link to start the inspection. Also, displays how old the inspection is.
Insured: Displays the policy holders’ name
Address: Displays the full address of the property
Type: Displays the inspection type.
It is color coded to show the current status: Grey = Scheduled Orange = Started Blue = Completed
Also shows the expected time the inspection should take. This is a fixed time for each inspection type and is used to calculate route times.
Time Period: shows the appointment time range
ETA: The expected time of arrival at the property.
Time Started: The time the inspection was started. (Only displayed once you add an answer into the inspection.)
Completed: The time the inspection was set to completed. The time between started and completed is also displayed. (Only displayed if you have set the inspection to completed.)
Distance: The mileage to this property (from the last property).
Travel: The travel time to this property (from the last property).
Planned Route Menu
The Planned Route section has a menu available:
It shows the Start Address, End Address, Start Time and End Time.
These values are entered by the Scheduler Admin user when calculating the route and help in determining start and end points within the specified time range. These fields are not editable to an inspector and can not be changed.
If these fields are blank then then Scheduler has not entered any of these requirements.
Download Route
If you want to download the schedule in CSV format then press the Download Route button in the menu: